In this series of posts, I will explain how to build a Windows Server 2008 cluster with Server Core and Hyper-V. There will be three posts as linked to below. Each post will be published as it get ready. Each post will have step-by-step snapshots. If it happens a certain image thumbnail is not good enough for you, then click on the snapshot to see a larger image.
1st Part: Hyper-V & Server Cluster – Server preparation (You are here)
2nd Part: Hyper-V & Server Cluster – ISCSI Storage preparation & Configuration
3rd Part: Hyper-V & Server Cluster – Creating Windows Server Core 2008 & Hyper-V Cluster
1st Part: Server Preparation:
We all know that Server Core offers the best way to build a Hyper-V infrastructure because it reduces the area of attack and maximizes the availability of resources. On the other hand, it does not have GUI and is therefore a little harder to manage.
This series of posts will try to show Server Core in a more manageable light as well as describe how to work in pure cmd.
First, in order to save time and space, I’m going to make a few assumptions.
We’re going to build a two-node cluster, with each containing a Server Core. We’ll assume that the AD is already in place so that we don’t have to touch it. Given the variety of storage solutions available, let’s assume that the LUNs are already created and that they are visible on the nodes. If they are fiber, then they should be seen easily; if they are iSCSI, you have to configure the iSCSI initiators.
In this article, I am going to work with the more difficult case, which means that we should set up iSCSI targets in the Server Core. This requires more work but it gives us experience for the future.
Overview of the solution:
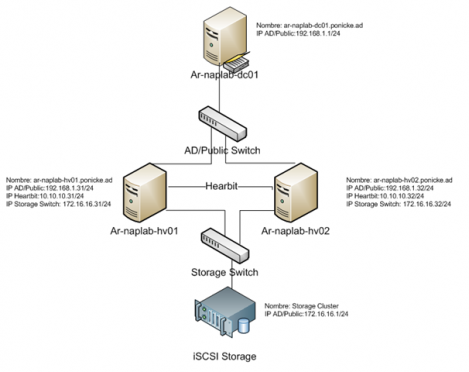
A running AD to which to attach the nodes. In my case, ar-naplab.dc01.ponicke.ad, a storage with 3 LUNs: one with 500MB for the quorum and two with 20GB for the HAVMs (High Availability Virtual Machines).
Two Server Core Enterprise Edition with three network cards (in this case, we should really use four, but to keep things simple, we will share the public network card with management and VMS). Each Network Card should be connected to its corresponding switch.
Here is the basic diagram:
The Server Cores must be completely un-configured, as this is the goal of these posts.
Once again, in order to save space, work and so on, I’m going to describe the steps for just one of the nodes. However, keep in mind that these steps must be carried out on both nodes, keeping in mind the parameters for each.
First, we will rename the nodes so that they match the diagram.
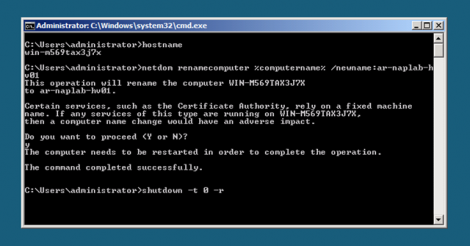
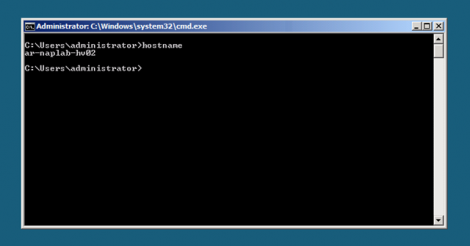
Use the command hostname to see the current name and then use netdom renamecomputer to rename it.
The command in Node 1 will look something like this:
netdom renamecomputer %computername% /newname:ar-naplab-hv01
And the command in Node 2 will be:
netdom renamecomputer %computername% /newname:ar-naplab-hv02
Then, we will reboot with shutdown –t 0 -r
Let’s look at this in action:
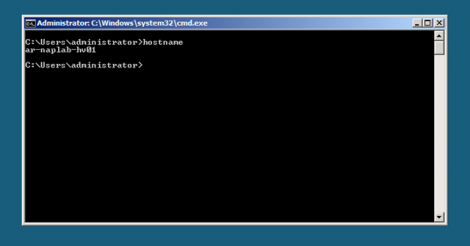
Once the restart is complete, we should have something like this:
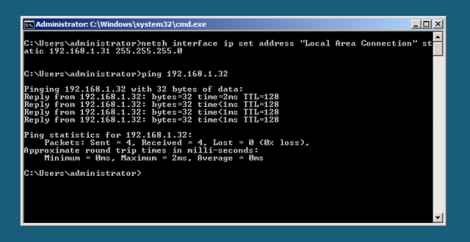
Now, it’s time to configure the IPs for each network. As the diagram shows, I have three network cards connected to three different networks that are isolated from one another.
netsh interface ip set address “Local Area connection” static 192.168.1.31 255.255.255.0 in Node 1, and
netsh interface ip set address “Local Area connection” static 192.168.1.32 255.255.255.0 in Node 2
Ping to make sure that everything is going smoothly.
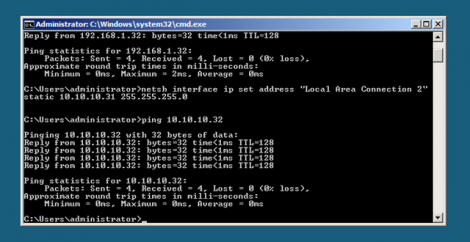
Now we’ll start with the Hearbeat IP.
netsh interface ip set address “Local Area connection 2” static 10.10.10.31 255.255.255.0 in Node 1, and
netsh interface ip set address “Local Area connection 2” static 10.10.10.32 255.255.255.0 in Node 2
Ping again to check connectivity.
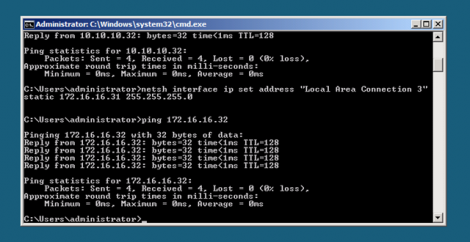
Here we will configure for the iSCSI network.
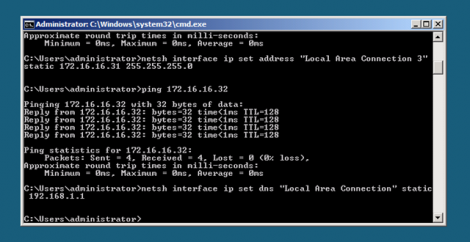
netsh interface ip set address “Local Area connection 3” static 172.16.16.31 255.255.255.0 in Node 1, and
netsh interface ip set address “Local Area connection 3” static 172.16.16.32 255.255.255.0 in Node 2
Once again, ping.
Now comes the time to unite the nodes to the domain. For this, it is important to configure those DNSs that have not yet been configured (so far, we have only dealt with IPs).
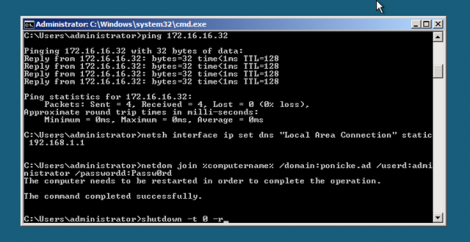
netsh interface ip set dns “Local Area connection” static 192.168.1.1 on both nodes
and now join the two nodes to the domain.
On both nodes run:
netdom join %computername% /domain: ponicke.ad /userd: administrator /passwordd:Passw0rd (Attention: make sure that it is userd and password; if there’s no mistake, the output should look like the image below)
And then restart with shutdown -t 0 -r
Once the restart is complete, we will have the basic infrastructure for our cluster with Hyper-V in Server Core. We are now ready to continue to our next post.
This article was originally posted in Spanish by ponicke, but due to its important content and the fact that it is not available in English, we decided to post a translation of it on our blog. Enjoy it and thanks to Ponicke for the great article. Please note the article has been a bit modified where needed and to adapt with English.


[…] Ads « Building a Cluster with Hyper-V & Server Core (Part 1) and Creating a Windows Server 2008 Clust… Building a Cluster with Hyper-V and Server Core (Part 3) and Creating a Windows Server 2008 Cluster […]